Adding Content
Content is the lifeblood of a game; without it, there is no game. In this section, we will learn how to add content to our game.
Various types of content can be added to a game. In this tutorial, we will be adding an image to our game which will be loaded and consumed by Velaptor and converted into a Texture object. Other content such as fonts and sounds can also be added. You can even build custom content loaders to load other types of content for your game.
The types of content supported by Velaptor are:
- PNG images
- OGG audio files
- MP3 audio files
- Atlas texture metadata files (these are in JSON format)
- Fonts (TTF files)
Below are the steps to add content to your game. The steps are the same, no matter what kind of content you are adding; the only difference is the folder location.
There are plans in the future to improve how content is managed as well as support more file formats. The process laid out below is a process specific to Visual Studio and JetBrains Rider.
Step 1: Create Project
Create a basic Velaptor application.
For more info, refer to the Project Setup guide.
Step 2: Create content folder
Create a content folder based on the type of content being added.
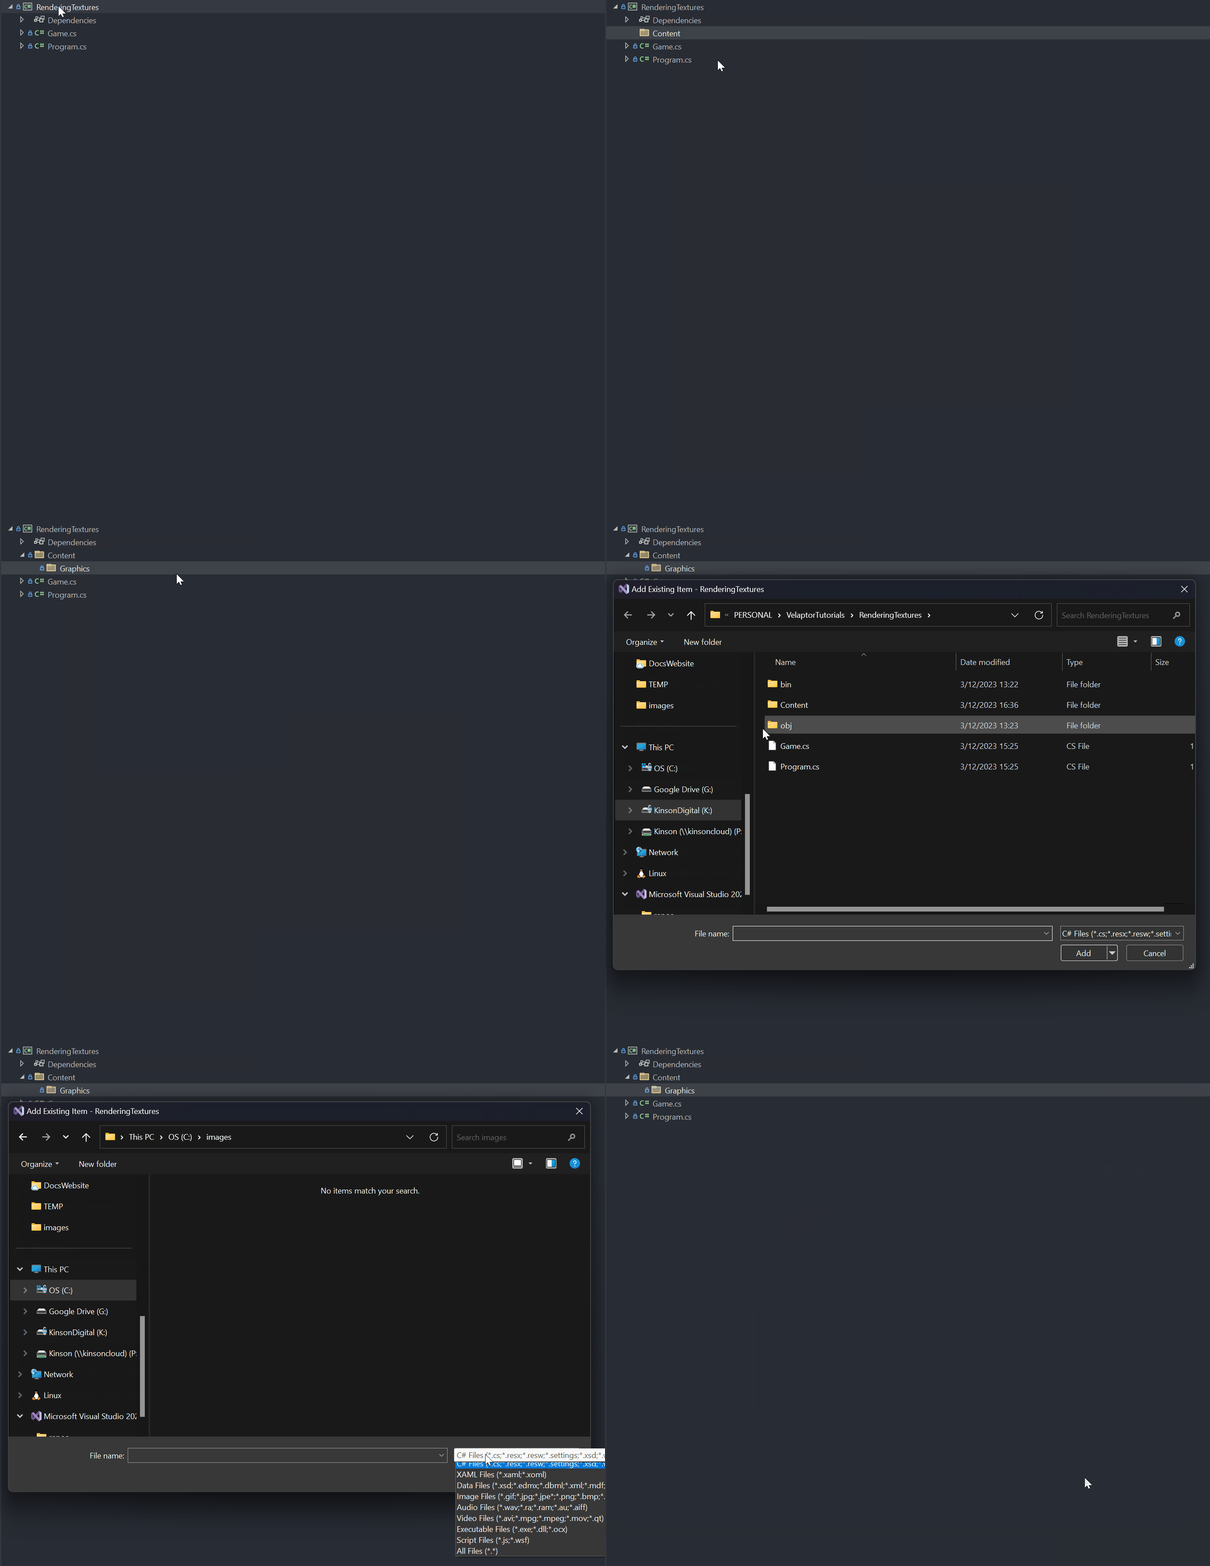
In the solution explorer, add a folder named Content to the root of the project, then add a folder named Graphics to the Content folder. Once this is complete, download the Velaptor mascot image and put it into the ./Content/Graphics folder.
- Visual Studio
- JetBrains Rider


In the same location as the running application, the Content/Graphics folder is required for Velaptor's default content location for graphics file content.
Step 3: Set as content
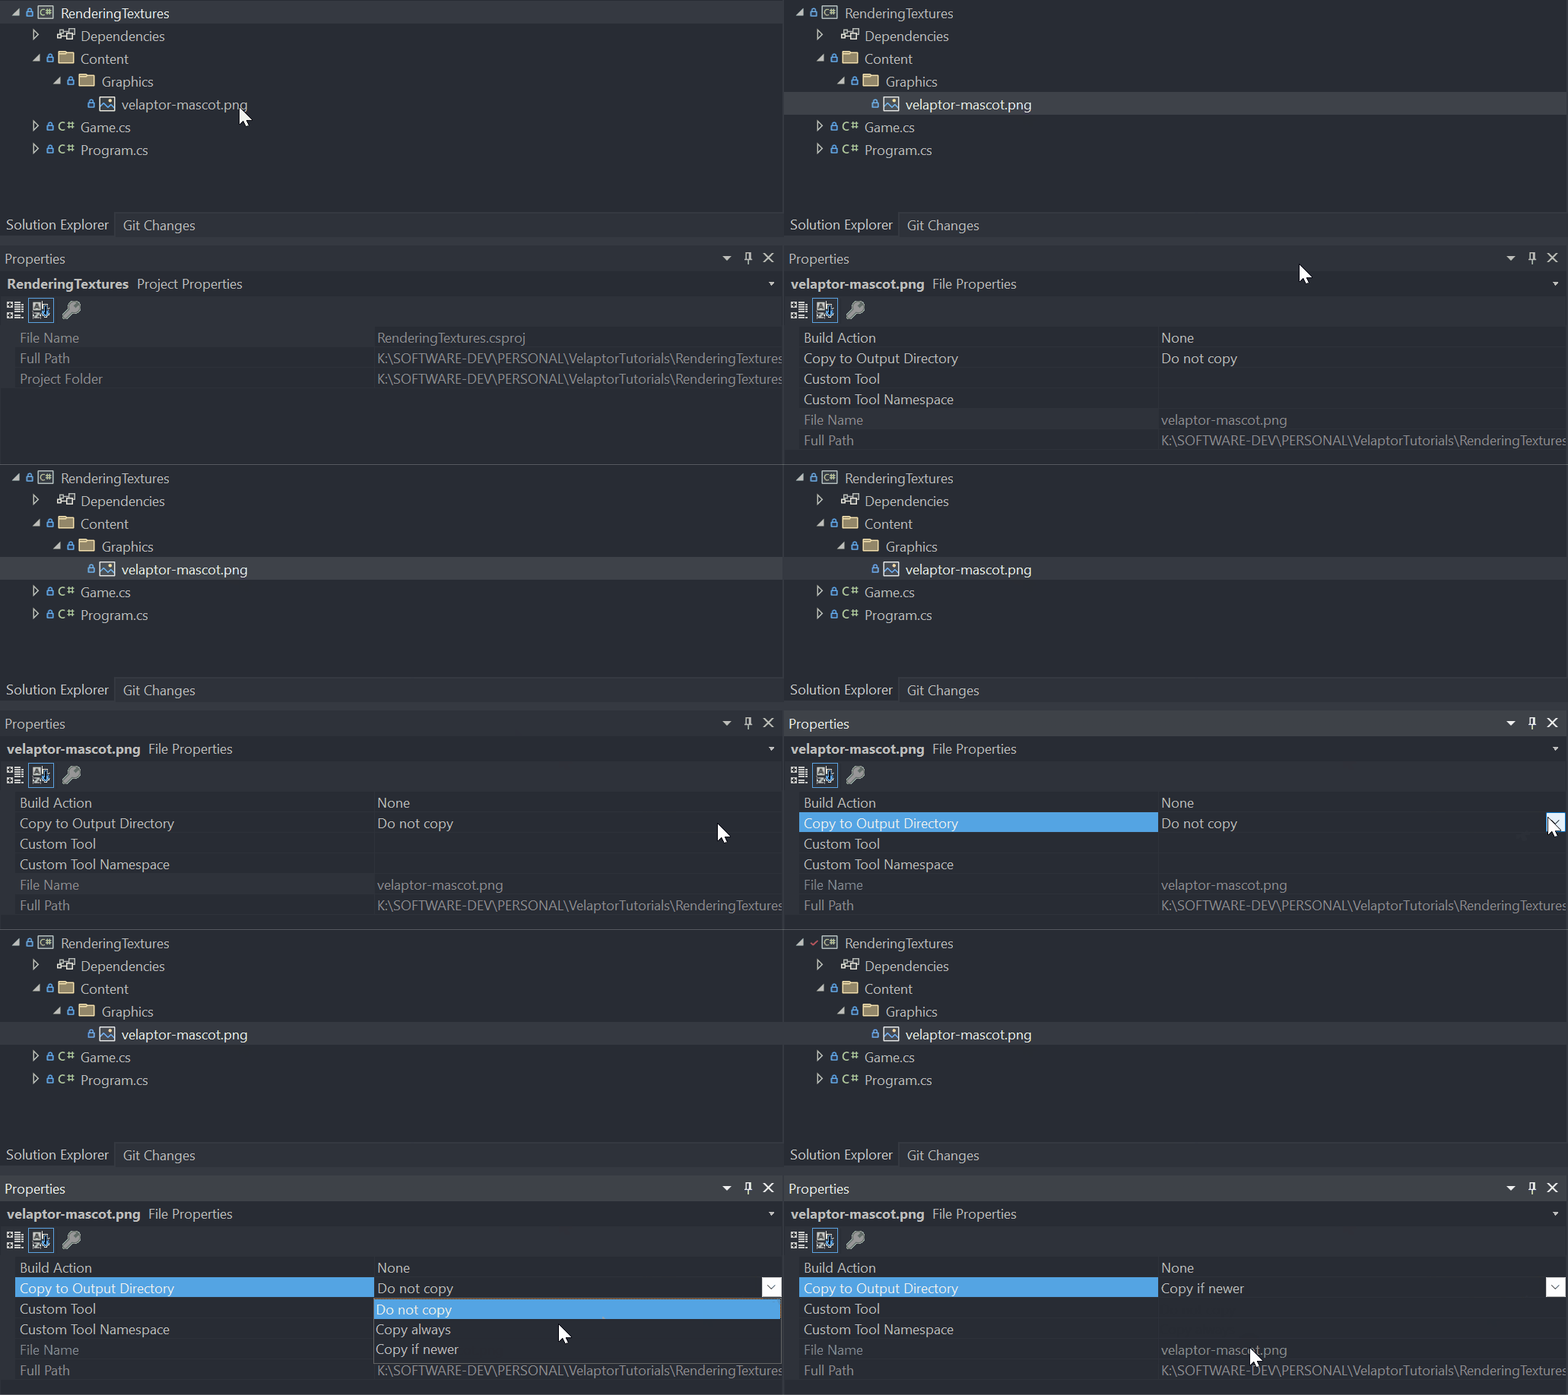
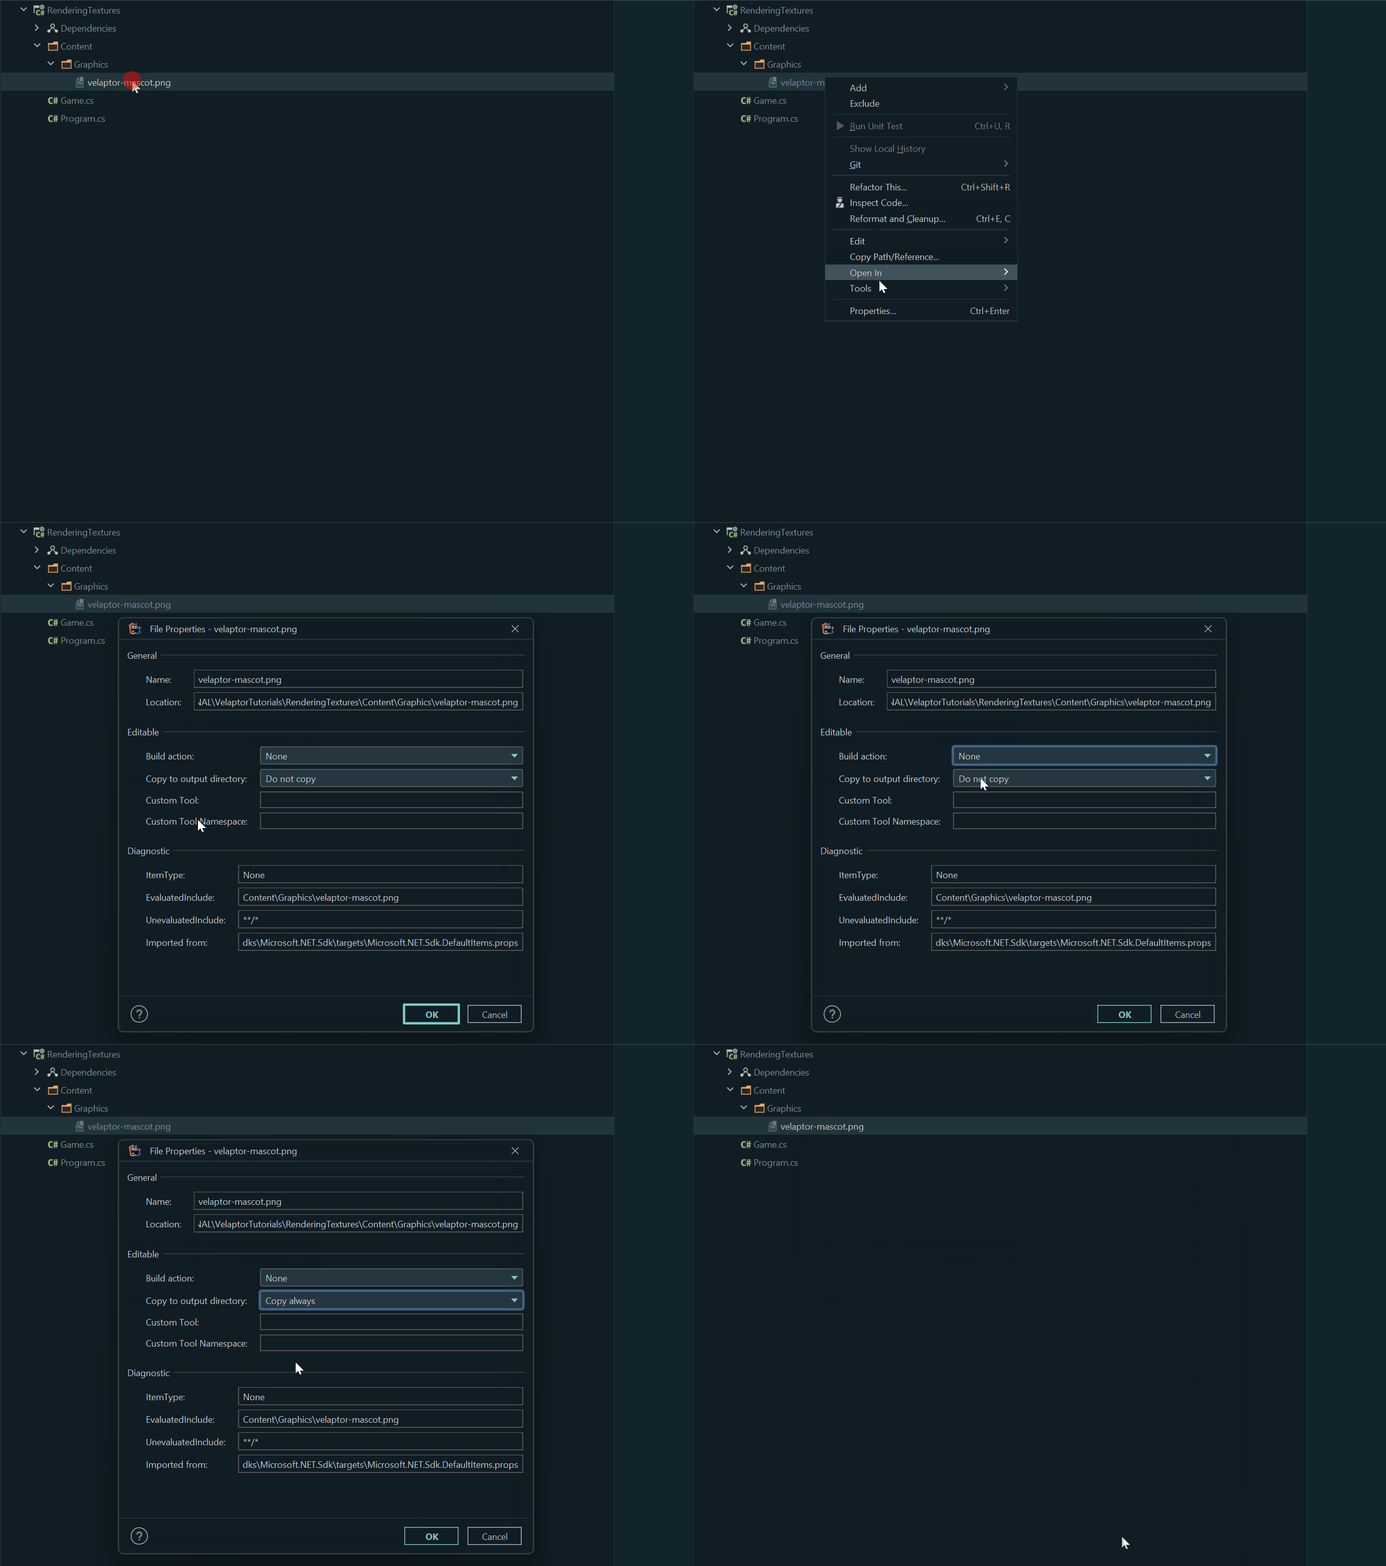
Now that the image file is added to the project, we can tell our IDE to copy the file and its directory structure to the build output location of where the application lives. This will update the appropriate content directory every time the project is built. Every time you add another content item to the project, you will need to follow this same process.
- Visual Studio
- JetBrains Rider

